Gardening with children can help to encourage a connection with the senses and a love of nature while also providing many opportunities to learn new skills, gain confidence and develop responsibility. And best of all…it's fun and gives them another reason to enjoy some active play outdoors!
Even if you don't have a green thumb or lots of space for gardens you can still incorporate small projects like this one into your outdoor planning for a home or centre based early learning environment. The project I am sharing today also works really well for school age children too.
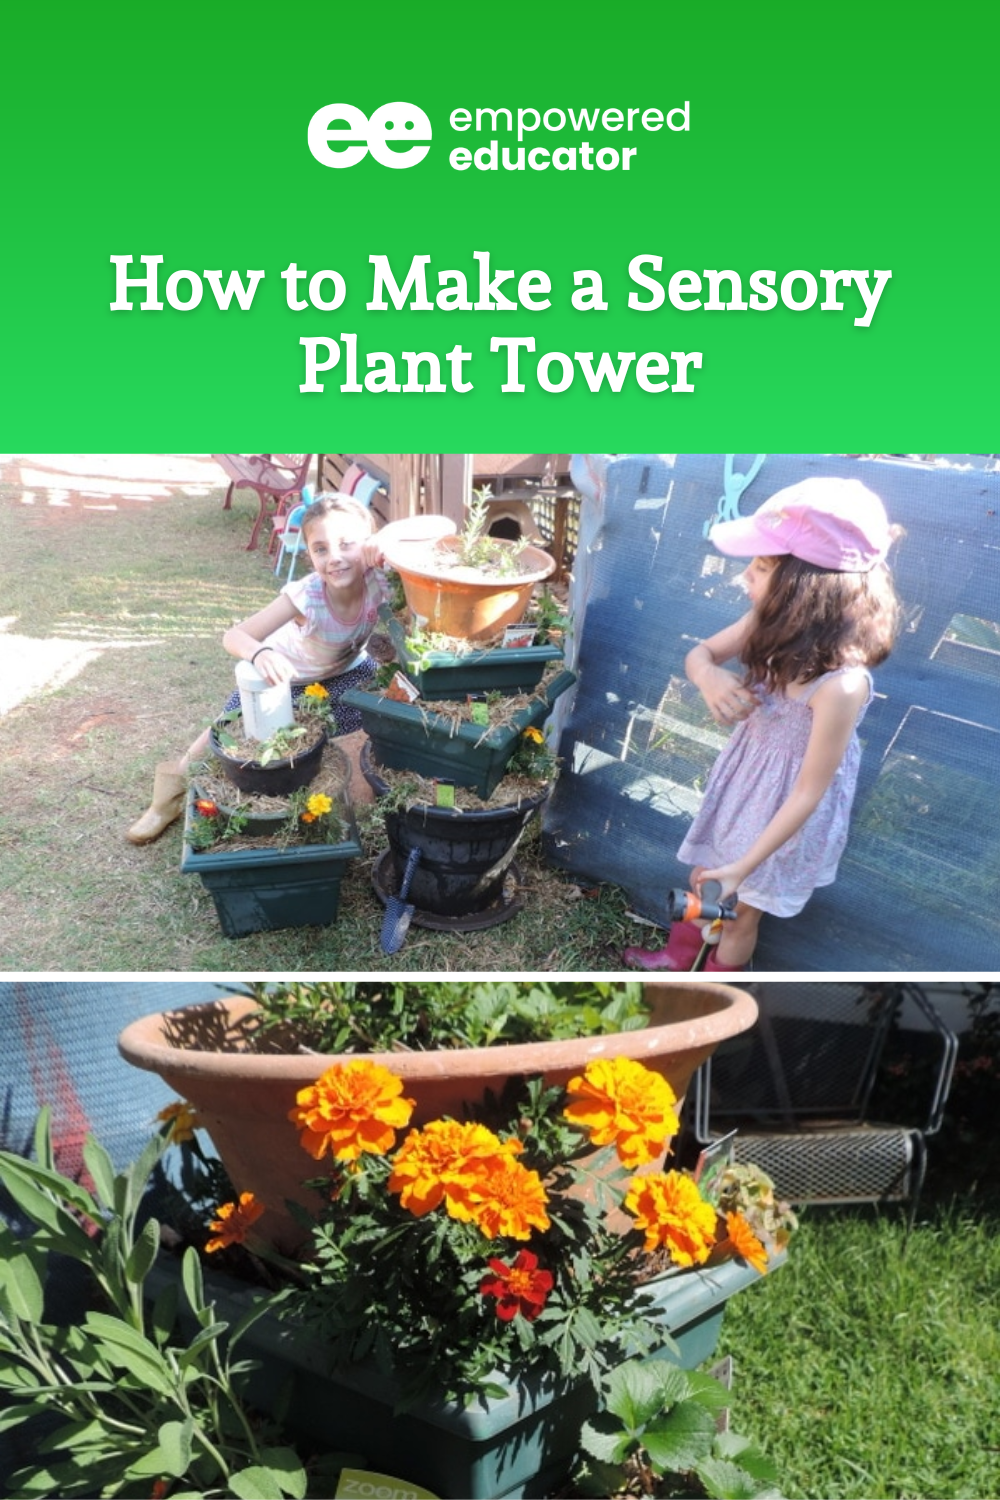
I wanted to share this garden project with you because not only is it easy to setup for a wide range of age groups to participate in it also introduces recycling and sensory elements through hands on active learning. You can make your sensory plant tower bigger or smaller depending on the materials you collect or have already available. Want to have a try making your own with the children?
Read through the simple directions below and let's get started gardening with children!
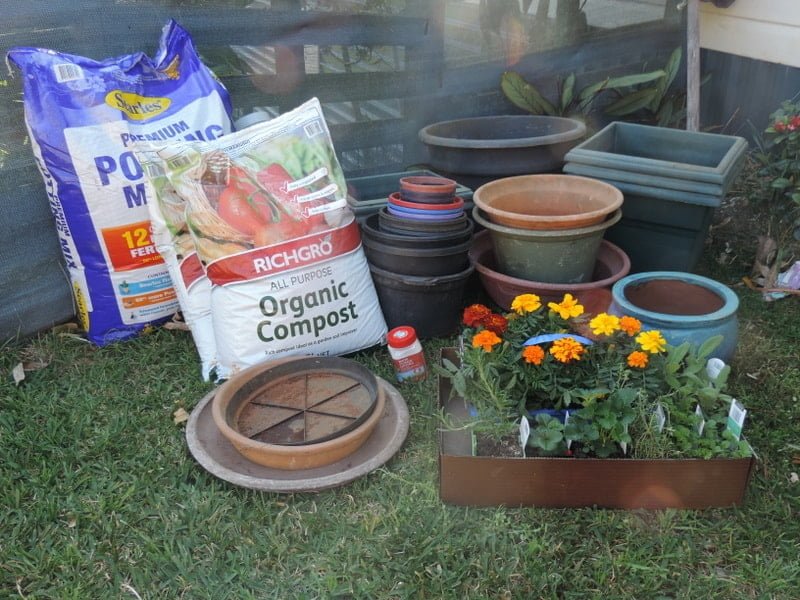
What you will need….
- A collection of old planter pots of various sizes – you will need some wide, larger pots for the base (We used both square and round pots because that us what we had in the shed…this is about using what you have!) You will also need some smaller pots to fit inside the larger pots to act as spacers.
- Some plant seedlings that will engage children's senses (we used a mix of herbs, flowers and vegetables) If your budget is small you could use seeds instead, it will just take a little longer for children to see the results of their efforts.
- A bag of good quality potting mix and compost.
- Water crystals for plants (optional)
- Lots of lightweight gardening scoops the children can use (small seedling pots for scooping up soil work well too!).
- Gardening gloves if you are concerned about potting mix (we never use ours as we love the feel of soil in our fingers and it's easier to make holes when planting! – hands can be washed!!)
- Sugar cane mulch (optional)
What you need to do…..
- Involve the children in collecting the old pots with you (you might need to plan ahead and ask for some family help to build your collection!). You don't need as many as we have – apparently we can never throw out a pot so they take up half our shed just waiting for the perfect project 😉
- Give them a quick hose and make sure to check for any lurking spiders and other crawlies if they have been sitting for a while.
- Ask the children to help you stack the pots into different size categories. Keep it simple with big, small, smaller (or medium). I also like to incorporate some intentional teaching with a few basic counting and sorting games – sort by size, colour, shape. Count all the large ones, the black ones, the square ones….you get the idea!
- Choose 3 or 4 of the larger pots and think about how you want to stack them – ask for the children's ideas too!
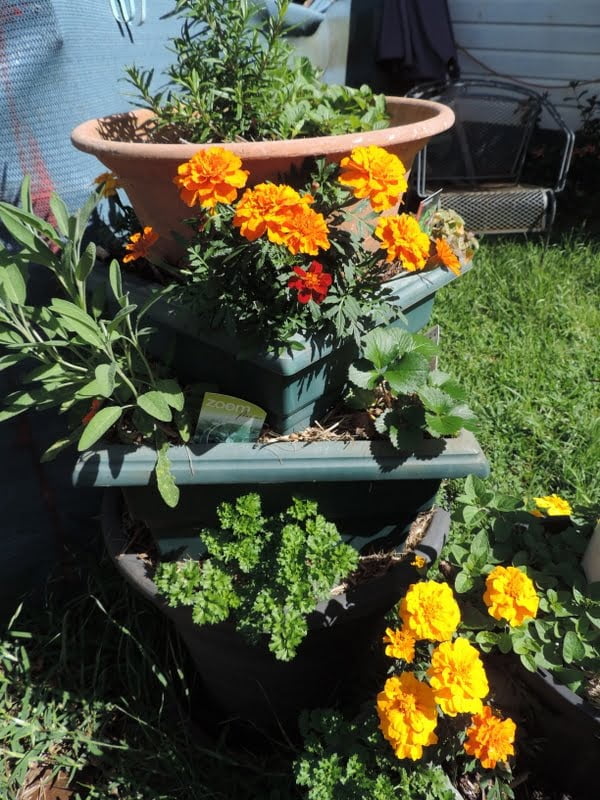
- What we are aiming to do is place the pots inside each other to create a tower but you want to make sure you have enough soil circumference to plant into.
- When you have decided on the larger pots you will use take a few of your smaller plastic pots (the ones that small shrubs and plants come in from the garden centre work well) and turn them over on a stable surface. Use garden clippers to cut a rough hole in the bottom of each pot as you see in the pictures below (this is so water can drain through to pots below)

- You need to place one of these pots with the hole in bottom (to allow for drainage) upside down inside the larger pots to act as a spacer to hold the next pot up a little higher.
- This then allows you to fill the spaces with soil as you build your tower. You can skip this step if you like and just place one pot on top of the other – you will just use more potting mix.
- Use a large tub, bucket or wheelbarrow to mix some potting mix, compost and a few spoonfuls of water crystals together to create a healthy growing environment for your new sensory seedlings. The children usually love to help with this part.
- The water crystals are important if you live in a hot climate like we do as the growing space is quite small in the pots so they need a little extra help retaining and drinking in the water. They aren't a necessity though if the budget doesn't stretch that far…just make sure to water every day or second day if it's hot.
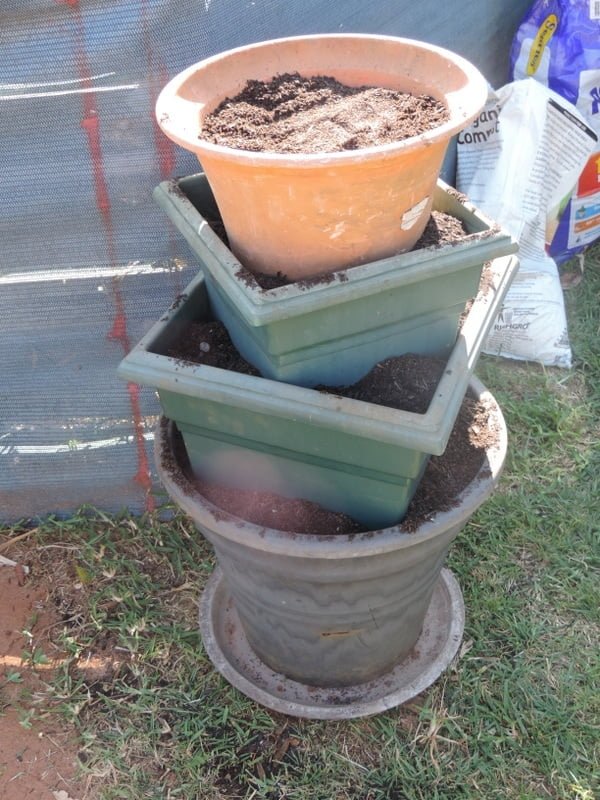
- Show the children how to use small pots or garden trowels if you have them to scoop up the soil mixture and fill in all the spaces. If you want more space to plant in you might choose not to place the pots at an angle like we have. By turning them like this though it creates separate spaces for little hands to fill with different types of plants. It also helps them to recognise the space they worked on and then look after as the plant grows. This method works really well if you have a large group of children participating.
- When you are happy with the soil level it's time for everyone to choose their seedlings and get planting.
- Show the children how to make a hole in the soil deep enough to cover the roots of the plant. Fill in the soil around the plant and then pat it down firmly so it's not falling over and looks happy (we call it tucking the plants in!) Why not also add some plant markers the children have decorated to let everyone know what is growing there (you could also add the children's names for that section if you wanted to).
- We often cut up clean plastic milk containers into arrow shapes to push into the soil for our plant markers. The children can decorate them with sharpies or paint. We have also used old spoons from the op shop and just painted them then pressed the handles into the soil. If you are looking for more creative ideas stop by this article for a little inspiration.
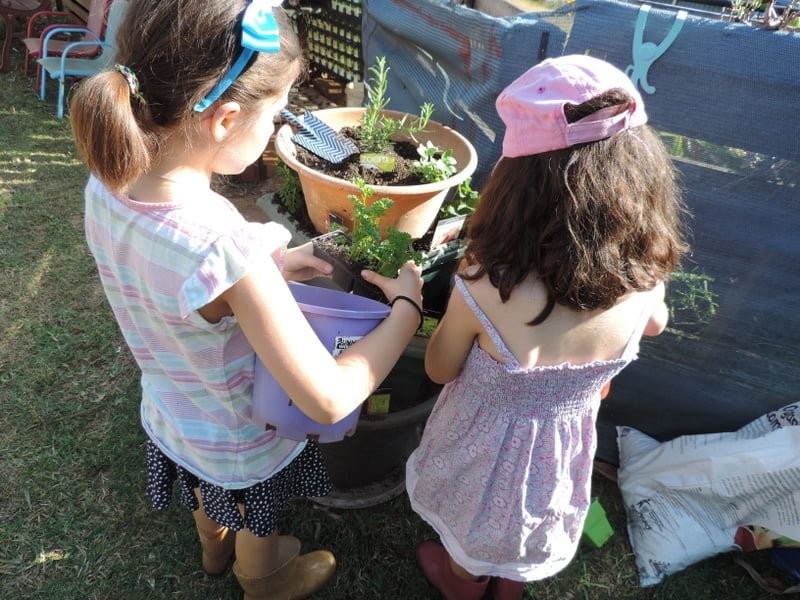
I suggest putting the plants up top that don't like to be wet all the time and are more hardy as the water will drain through the black pots you put inside the larger pots (as spacers) all the way through to the bottom.
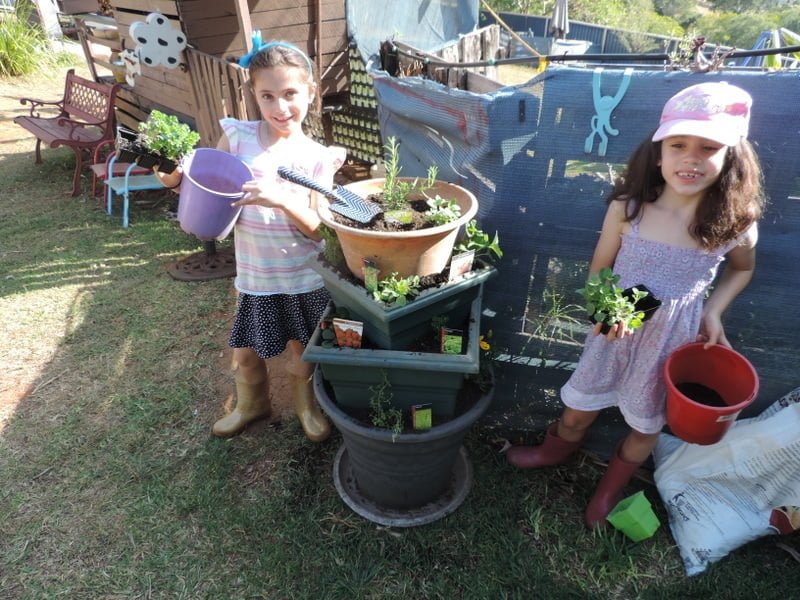
- Talk about how you can look after the new plant towers together and what the plants will grow into.
- Hand out the watering cans or hoses and gently water the soil and plants. This is a good opportunity to talk about how often to water the towers and why plants need water more often when in pots.
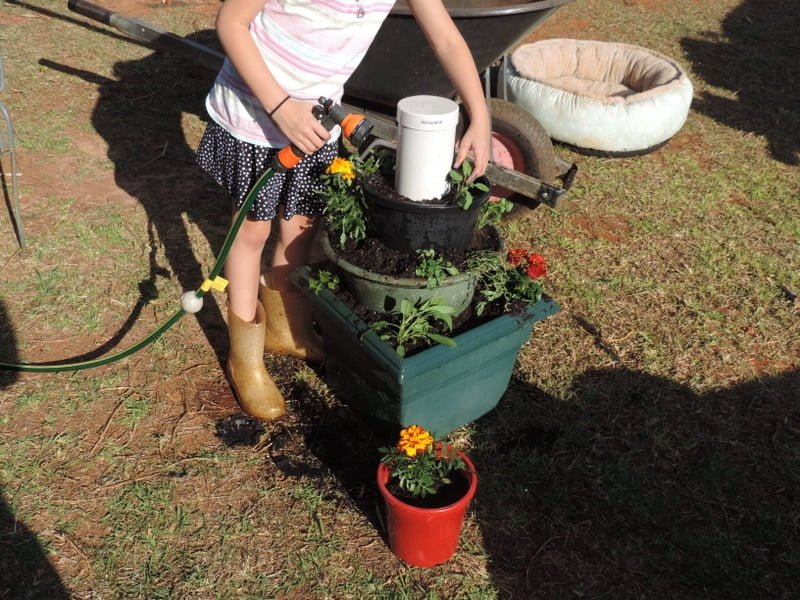
Now everyone can work together to break apart the bale of sugar can mulch (or whatever mulch you choose to use) and add carefully on top of the soil and around the plants. This can take a little bit of adult help if toddlers are planting with you! Water lightly once the mulch is in place and explain why mulching helps plants retain moisture as they grow.
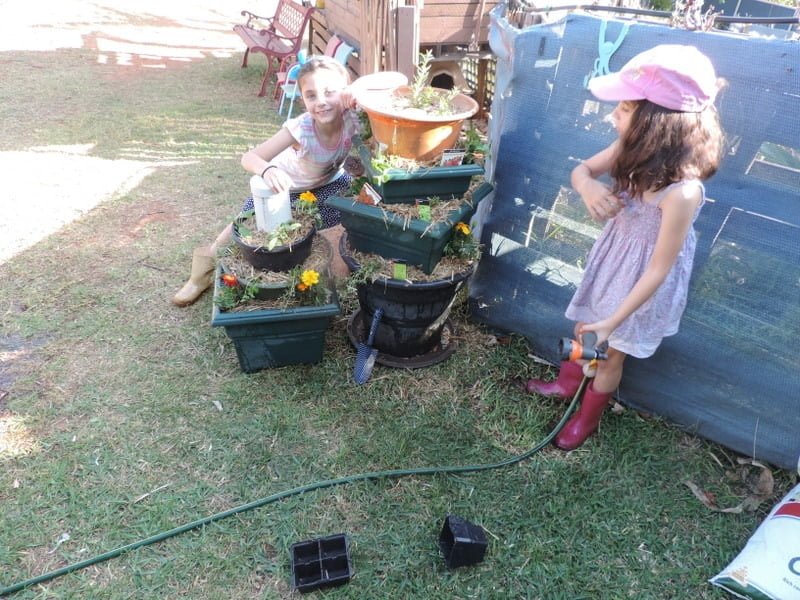
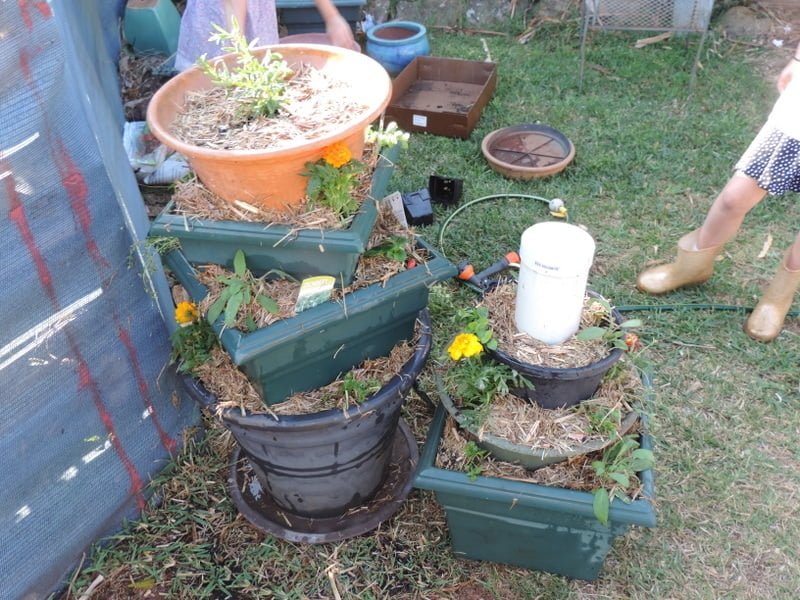
We also added some smaller versions of our worm compost towers to help with the growth of our soil and plant yields. You can see how to make and use them here. Another fun hands on sustainability activity to add to your outdoor learning plan!
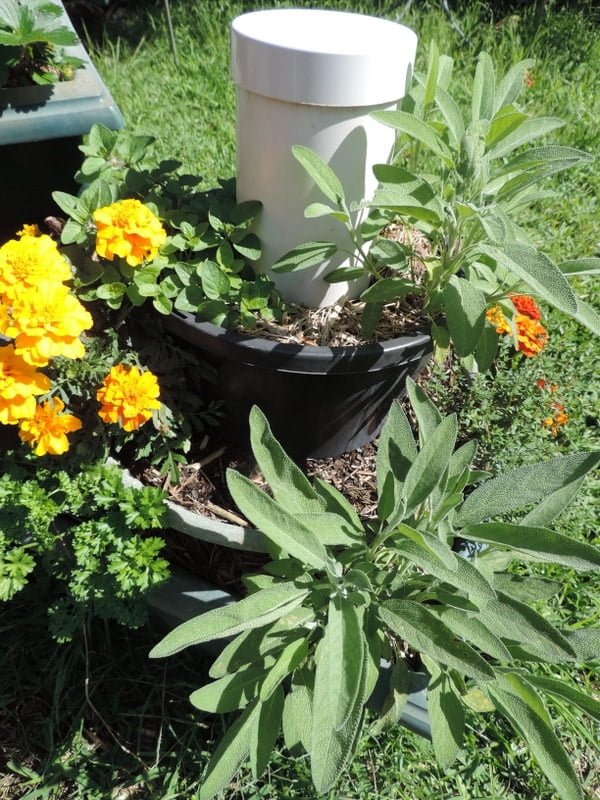
You really can plant anything you prefer but because I wanted to make the towers a sensory experience to include in little spaces around the garden I chose seedlings to suit that desired outcome.
The aim is for your towers to really engage the children's senses as they brush past while playing, watering or picking the herbs, vegetables or flowers so make sure to think about your selection of plants and what you feel would work best for your environment and children.
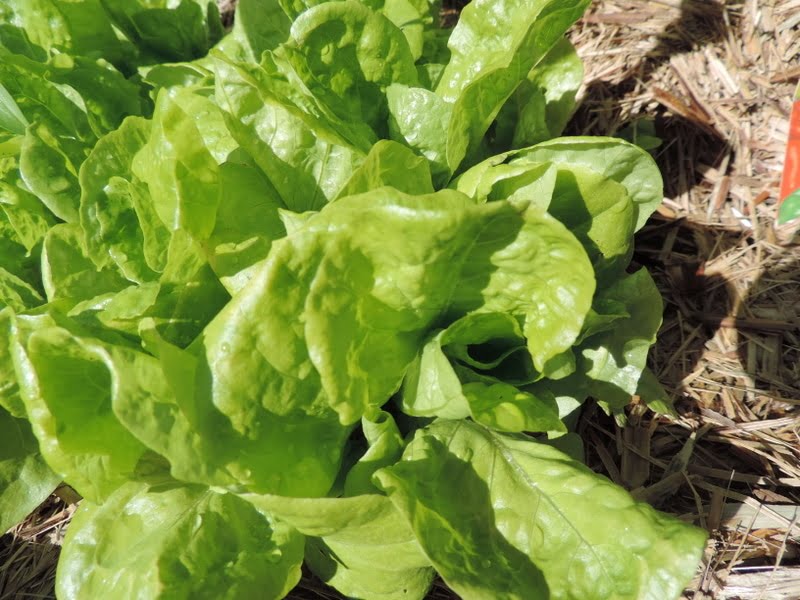
Where you live in the world and the sort of climate you enjoy will impact on the sort of plants you want to add to your towers but I've included some of my personal favourites below that are safe for children to touch, smell and in most cases taste or are just colourful and interesting to look at.
What type of sensory/edible plants can I use when gardening with children?
Succulents – just be careful not to get the variesties with spines or spikes. There are some lovely small and colourful succulents that children enjoy touching and they can be grown from just a cutting so very economical too! The deep purple ones that look like flowers are our current favourite!
Lamb's Ear – It feels soft and velvety and little fingers will love to investigate.
Marigolds – So many wonderful bright colours and patterns to look at and compare!
Chocolate mint – Because…..it really does smell like an after dinner chocolate mint!!
Sunflowers – Use the larger varieties in bigger gardens and the dwarf varieties to brighten up pots.
Basil – Show how to pinch the leaves and smell. Take them into the kitchen and add to spaghetti or a pizza.
Rosemary – A glorious smell and interesting for little fingers to touch. They don't need a lot of water so are good for the top pot in a tower. We pick the leaves to use in playdough, cooking, clay creations, mud kitchen fun, potion making and tied together as a natural paintbrush.
French Lavender – We use this wonderful plant in many of the same ways I mentioned above for rosemary. I love the soft textured feel of the leaves and the scent is enticing! It's also a good plant for childrent to practise those cutting skills by snipping off a little each week and creating a posy to take home or add to a bag as a natural air freshener or ‘sleep bag' for under the pillow.
Vegetables & Fruits – Plants like cherry tomatoes, rainbow silverbeet, purple carrots, strawberries, corn, lettuce and peas work well in plant towers as they are easy to grow, quite hardy and the colours and different textures interest the children, show a tangible reward for their efforts looking after the plant and usually lead to tasting when often vegetables and fruits are dismissed before they even hit the plate!
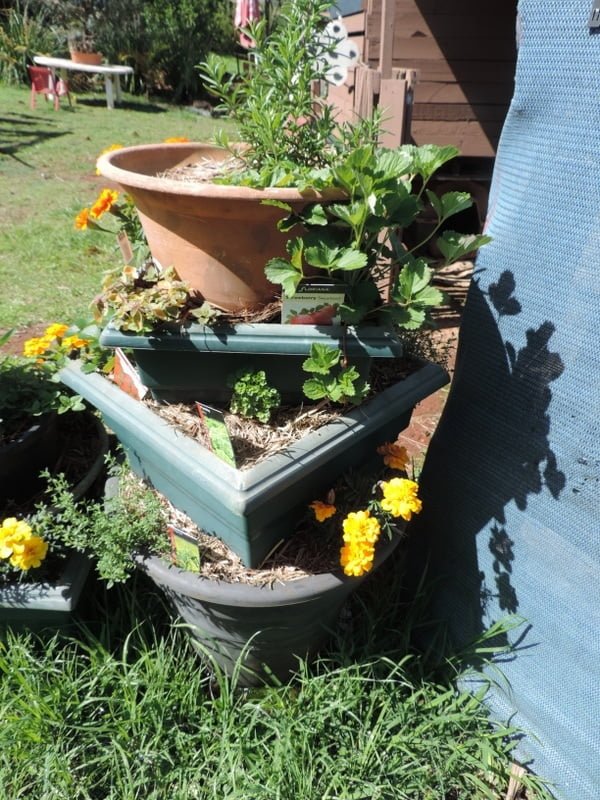
When they have had a hand in planting and being responsible for producing the food that ultimately ends up on the morning or afternoon tea platter they are more likely to at least try them!
There are of course many more to choose from but these are our favourites and always tend to do well in pots as well as stimulating the senses.
The plants grow quickly and the children will be able to start picking produce and flowers in a few weeks. Seeing the end result of their efforts in just a short time period is a great way of keeping them interested in gardening and wanting to try more!
What are they learning with this project?
A sense of responsibility as they not only plant the ‘babies' but also nurture and help them to grow by completing daily jobs.
A sense of pride and increased confidence as they achieve the goal of growing their plant, sharing with others and using the herbs, fruits and vegetables in the kitchen.
A clearer understanding of where food comes from before it gets to our plate, role of the farmer and garden centres, the basic plant lifecycle and caring for self with healthy eating and fresh foods.
Cause and effect – What happens if we forget to water the plants? Leave out in full sun on a very hot day? What will the weeds do if we don't remove them from the pots? Why are there holes in our lettuce?
Creative self expression – Choosing where and what to plant. Picking out colours, shapes and textures that interest them. Helping to arrange pots to form different sized towers.
Coordination, fine and gross motor muscle strengthening as they lift, carry, drag, scoop, pat, squeeze, pinch, dig, build and more.
Math, science and literacy skills as they sort, fill, empty, count, pour, categorise, see how plants grow, investigate different textures and tastes, label, identify and name plants, cook and much more.
Problem solving, cooperation and teamwork as they follow directions, decide what section to plant in, build the tower together, collect old pots, arrange in size groups, add smaller spacer pots to inside of larger pots and work together to create and look after a group project.
Environmental Responsibility – They see you reusing older materials rather than just throwing them out and buying new ones, growing own food, using the flowers, fruits, herbs and vegetables in many different ways and understanding the benefits and work that goes into growing plants and why we therefore need to look after them.
A connection to nature – Projects like this give children an opportunity to actively learn more about nature and the environment around them while having fun in a safe outdoor space.
If you have older children why not try this fun plant growth log activity while the seedlings are growing. Teaching Mama also provides some printable garden markers to use.
So many possible learning outcomes from a simple gardening with children activity. Feeling inspired to try making one of your own? I bet you don't stop at just one!
Pop over and share a photo of the fun you have gardening with children on The Empowered Ed Facebook page or in our friendly Empowered Ed Community of early childhood educators just like you, we'd love to see them!

Thank you so much for sharing these wonderful ideas!
Wow! I can’t wait to try this. This’ll even work on the balcony!